Whether you’re a student or a working professional, chances are you’ll need to use a document creation program at some point. Depending on your field, you may need to know one really well, or at least be able to utilize a few of its lesser-known features. Thankfully, unlike Microsoft’s renowned counterpart and some of the other alternatives, Google Drive offers a large buffet of productivity apps and features free of charge. Learning the ins and outs of Google’s answer to Word can take time, however, assuming you have no idea how to navigate the suite.
There’s no need to fret, however! This guide will walk you through the many facets of Google Docs, so you can create a document, collaborate with others, and edit your work in no time. Read on for all the details, or check out our guide on how to use Google Drive if you’re looking to make the most of Google’s entire arsenal.
Step 1: Setting up your Google account
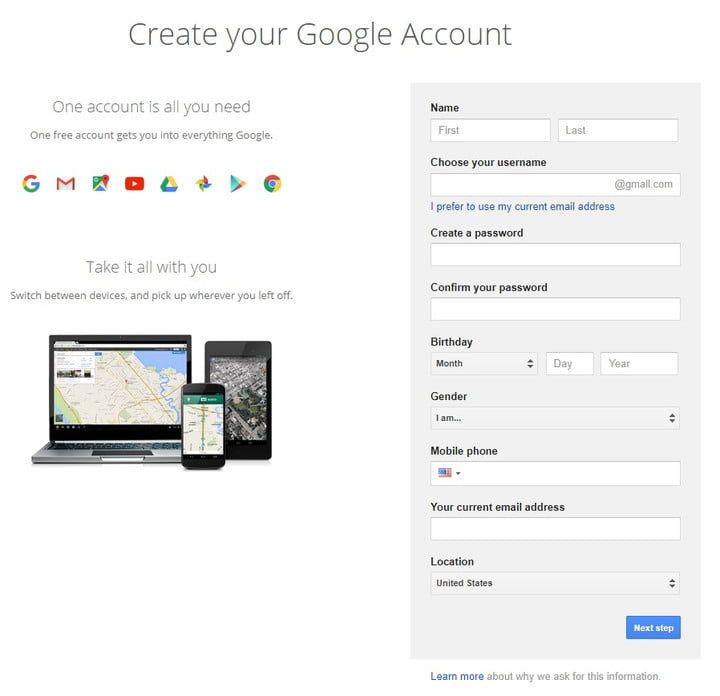
Using Google Docs requires you to sign up for Google account. It’s free to do so, though, and your account also provides you with access to Gmail, Google Maps, and YouTube, as well as the entire Drive suite.
To create a Google account, navigate to the sign-up page. Enter your information — including your name, email address, and birth date — and click Next Step. Read the Privacy Policy and Terms of Service and hit I Agree. Congratulations! You now have a Google account. If you already have an account, just log in as you normally would.
Step 2: Launching Google Docs
There are several ways to access Google Docs, depending on your device. You can download the app from the App Store or Google Play, or click the Apps icon in the upper-right corner of the Google homepage (represented by nine squares). You must then click the Docs button — you may have to click More in the pop-up menu to see it.
Alternatively, you can navigate to Google Drive and select Docs within the My Drive menu at the top, or select Docs after you’ve clicked New on the right-hand side of the page. The last option is to navigate directly to Google Docs. Once you’ve launched the web app, you’ll be ready to create a document.
Step 3: Creating a document
To make a new document, click the blank page with a blue addition sign inside it, which is located the upper-left corner of the main Google Docs page. If you can’t find this menu, scroll up or click the red arrow in the lower-left corner of your screen.
 If you are creating a document from Drive, selecting Google Docs after hitting New will automatically create a blank document. If you click the small, right-facing arrow next to Google Docs, you can even choose to create a new document based on a provided template. There are a variety to choose from, including résumés, business letters, and a selection of third-party templates. You can even upload an existing .doc or .docx file to your Drive by clicking New, followed by File Upload.
Step 4: Start working
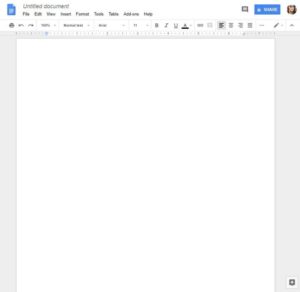
Once you’ve created a document, you can get to work. Click Untitled document in the upper-left corner to add a title to your document. You can also adjust the font type, text size, and much more via the toolbar at the top of the page. Clicking the three horizontal dots near the right side of the page will bring up some additional formatting options. If you can’t see your title or the menu bar at the top of the page, those options may be hidden. If that’s the case, click the downward-facing arrow in the upper-right corner to display them.
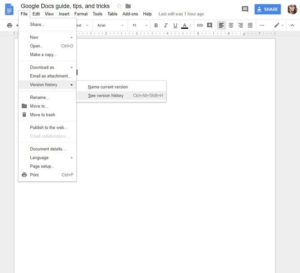
Since you’re working within your browser, any changes made to your document will be saved automatically. If you look to the right of the Help option at the top of the screen, you should either see Saving… or All changes saved in Drive. Wait for the second message to appear before exiting out, just to ensure all your work has been saved. To show the Version History of the doc at hand, click Saving… or All changes saved in Drive, which will allow you to review the changes.
How to share your stuff
To share your documents with other people, click the blue Share button in the upper-right corner of the doc you wish to share. The button will be wedged between your picture — assuming you’ve added one to your Google account — and the comments icon. Afterward, invite other users by entering the appropriate email address in the resulting window.
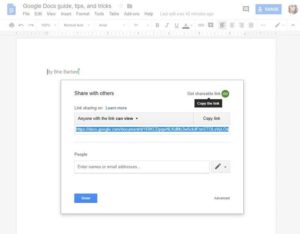 People you share with can either edit, view, or comment on a document depending on what permissions you grant them. This can be changed by tapping the menu directly to the right of the empty address field. If you want to share the document with people using something other than email, click Get shareable link at the top of the Share window. A link will then appear directly beneath (it will also be copied to your clipboard).
If you click the Advanced button in the lower-right corner of this window, you can also share the file via Gmail, Google+, Facebook, or Twitter, but this will require you to make your document public. Google Docs sets the privacy settings to Private by default, but you can always click the blue Change button in the middle of the Advanced window (under “Who can access”) to adjust your privacy settings.
Use the comment and chat functions
With Google Docs, you can watch in real time as other people make changes to a document. By clicking the Comments button in the upper-right corner of your screen, you or anyone else who is in the document can start a discussion about your project. You can also see which users are currently looking at the document using the series of circles located to the left of the Comment button. If no one besides you is looking at a given page, nothing will appear here.
You can also set it so that you receive notifications when people make changes to the document, or when someone mentions your name or interacts with one of your comments. This can be a very useful tool for collaborating with large groups of people or a group that’s not in the same physical space. If for some reason you don’t want users to be given the option to add comments to a given document, you can also change the editing mode (more on that in the next section).
Get to know the various editing modes
Located directly beneath the Share button are options for viewing, suggesting edits, and editing documents. While the Editing option lets you make edits, Suggesting and Viewing allow you to suggest edits and view or print your document, respectively. The Suggesting option is similar to the Track Changes function in Word, and will denote any changes made to the document in green. This gives other users the option to approve or delete these edits before they become a part of the final document. Even if you’re not using the Suggesting mode, you can always view a document’s revision history by going to File > Version history > See revision history.
Google Drive has more to offer than just text documents. Slides, for instance, is Google’s version of Microsoft PowerPoint, while Sheets is the company’s take on Microsoft Excel. While not always as extensive as Office 365 in terms of functionality, the G Suite is a useful and convenient way to create content online, and is free to use once you have a Google account.